A living room’s walls are prime real estate, yet many homeowners leave them bare or cluttered without intention. The right small wall decor can anchor a room, draw the eye, and reflect personality without requiring a full renovation. Whether someone’s working with tight square footage, rental restrictions, or simply prefers understated style, strategic wall treatments deliver impact. This guide walks through seven practical approaches to elevating living room walls, from floating shelves to gallery walls, with honest advice on installation, material choices, and design decisions that actually work.
Key Takeaways
- Strategic small wall decor transforms a living room by anchoring the space, creating visual flow, and reflecting personality without requiring a full renovation.
- Floating shelves, gallery walls, mirrors, and textiles each solve practical problems while adding visual character—pair function with thoughtful aesthetics for maximum impact.
- Follow the “less is more” principle: use odd-numbered groupings, maintain 30–40% empty space on shelves, and leave 2–3 inches between gallery frames to prevent clutter.
- Position mirrors opposite windows to reflect light and make tight spaces feel 20–30% larger, and always use heavy-duty fasteners or wall studs for safe installation.
- Wall-mounted plants add organic movement and improve air quality, but choose species suited to available light and position drip trays to protect surfaces from moisture damage.
- Start with one intentional focal wall, ensure all pieces are securely installed with proper hardware rated for their weight, then expand your design gradually for lasting results.
Why Small Wall Decor Matters In Living Rooms
Small wall decor isn’t filler, it’s the difference between a room feeling finished and one that feels incomplete. A living room wall is where guests’ eyes naturally travel, and intentional decor anchors the space, creates visual flow, and establishes mood without dominating the room.
Beyond aesthetics, strategic wall decor solves practical problems. Floating shelves add storage and display surface. Mirrors bounce light and make tight spaces feel larger. Textiles absorb sound and soften hard surfaces. Each piece can serve dual duty: visual interest plus function.
The key is restraint. Living rooms benefit from the “less is more” principle, one strong gallery wall or a curated shelf beats a chaotic mishmash of items. Thoughtful spacing, grouped display, and consistent materials (wood, metal, textiles) create cohesion.
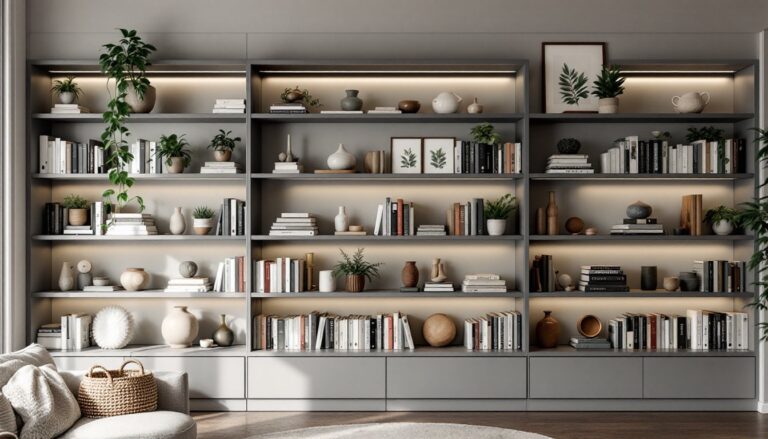
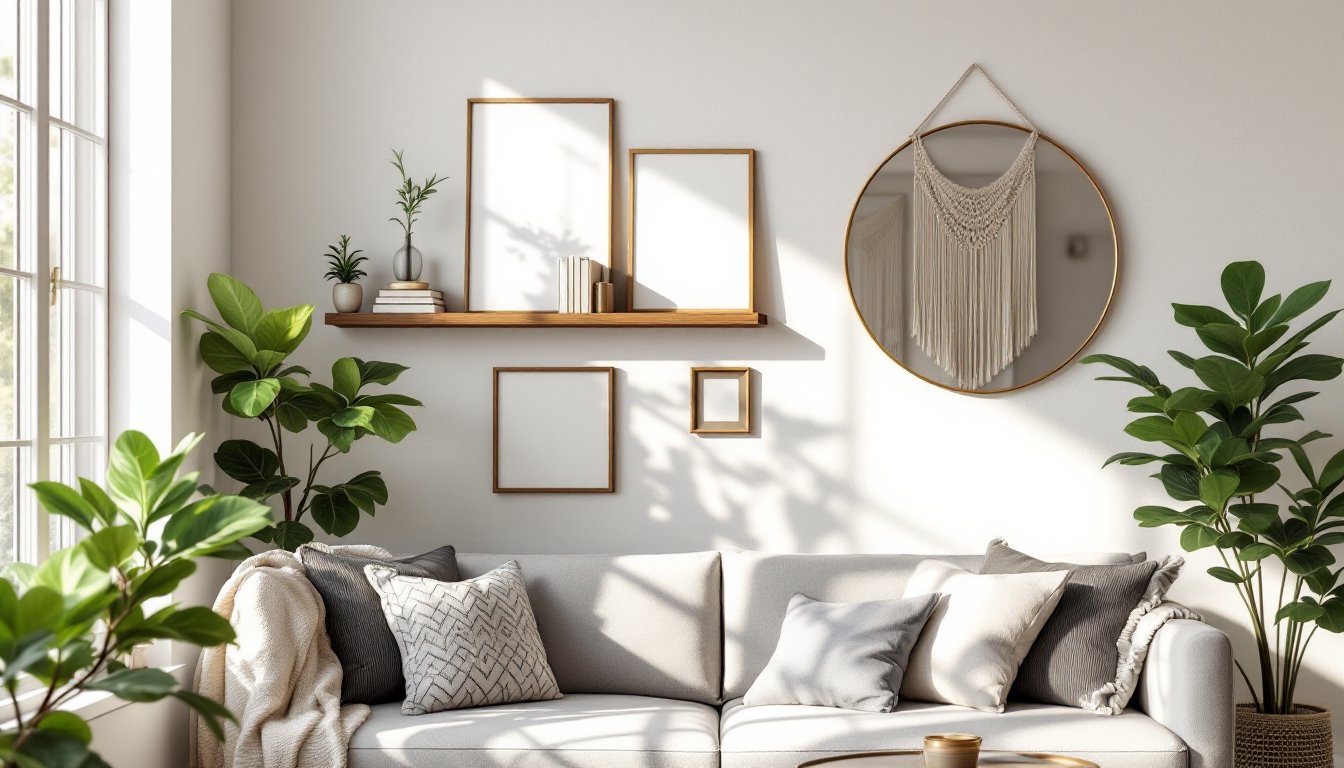
Floating Shelves And Minimalist Displays
Floating shelves are popular for good reason: they add storage and display without visual bulk. A 12-inch-deep floating shelf works for most living rooms, deep enough to hold books, plants, and small art, shallow enough not to obstruct sightlines.
Installation basics: Floating shelves require wall studs (16 inches on-center in most homes). Use a stud finder to locate them. Attach a French cleat (two interlocking wooden brackets) to studs, then slide the shelf onto the cleat. This method handles 25–50 pounds per shelf, depending on shelf material and cleat quality.
For renters or plaster walls: Heavy-duty floating shelf brackets rated for drywall anchors (like toggle bolts or heavy-duty expanding anchors) work, but max weight drops to 15–20 pounds. Read manufacturer specs, don’t guess.
Display strategy: Follow the rule of three, group objects in odd numbers. A stack of three books, a small plant, and a framed photo create visual rhythm better than scattered items. Leave 30–40% of shelf space empty: it prevents clutter and lets each item breathe.
Material matters. Walnut, oak, or painted MDF shelves pair well with metal brackets for a modern look. Reclaimed wood adds warmth. Avoid overstuffing: restraint is the defining feature of minimalist displays.
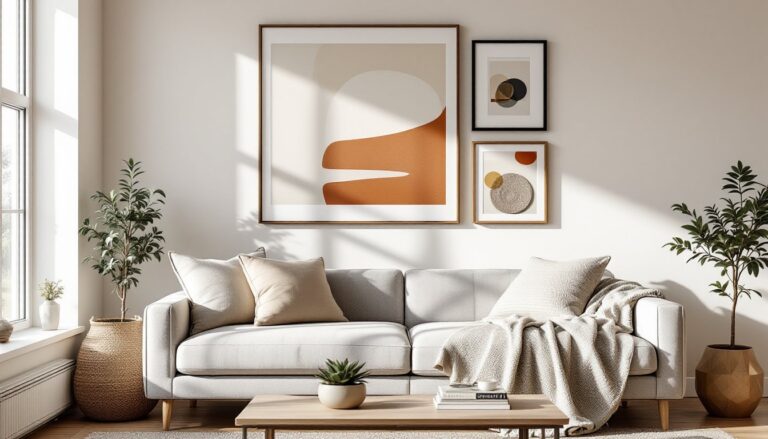
Gallery Walls And Framed Art Arrangements
A gallery wall, a clustered arrangement of framed art, photos, or mixed media, creates focal points without overwhelming a room. For small living rooms, limit galleries to one wall and keep frames within a 36–48 inch height range so they don’t feel top-heavy.
Planning layout: Measure and mark frame positions on kraft paper or cardboard first. Tape paper to the wall, arrange frames on it, and photograph the layout. Then mark nail holes and hang the real frames. This prevents the “oops, that’s crooked” syndrome.
Frame consistency: Mix frame styles (metal, wood, canvas wraps) but stay within a color palette, all blacks and whites, warm metallics, natural wood tones. This creates unity even with varied art styles.
Spacing: Leave 2–3 inches between frames at minimum. Too tight feels chaotic: too spread out loses impact. For odd-numbered groupings (3, 5, 7 frames), odd numbers read as more intentional than pairs.
Hanging at eye level: The center of your gallery should sit at 57–60 inches from the floor, human eye level. This is standard in galleries and homes for a reason. It draws viewers in without forcing them to crane their necks.
Use appropriate fasteners. For drywall, picture-hanging rails or museum hooks rated for frame weight work well. For plaster, toggle bolts handle heavier frames. Avoid nailing into tile or brick without a carbide bit and hammer drill.
Wall-Mounted Plants And Greenery Options
Living plants on walls soften hard surfaces, improve air quality, and add organic movement. Wall-mounted greenery ranges from simple hanging planters to elaborate living walls.
Practical options for living rooms:
- Hanging planters (plastic, ceramic, or fabric) suspended from eye bolts or U-bolts anchored to studs or drywall anchors. Keep weight reasonable, excessive moisture-laden soil is heavy.
- Wall-mounted shelves holding small potted plants (same installation as floating shelves, above).
- Macramé hangers for hanging plants. Knot work is decorative and distributes weight better than a single cord.
- Living wall panels (moss frames, preserved plant walls) add greenery with zero water or maintenance. These are glued to walls: follow manufacturer instructions for prep and adhesive.
Placement matters. Choose plants suited to available light. A north-facing wall needs low-light tolerant plants (pothos, snake plant). South or west faces suit sun-lovers (echeveria, jade). Don’t fight your room’s light conditions.
Watering and drainage: Hanging plants drip. Place a drip tray or saucer under hanging planters, or position them over non-absorbent surfaces (tile, sealed wood). Overwatering is the #1 plant killer, check soil moisture before watering.
Living walls and moss frames require no watering, making them ideal for busy spaces. They’re pricier upfront but eliminate ongoing maintenance.
Mirrors And Reflective Surfaces
Mirrors are practical wall decor: they expand perceived space, bounce natural light, and create visual interest. In small living rooms, a strategically placed mirror can make the space feel 20–30% larger.
Mirror placement strategy: Position mirrors opposite windows to reflect light deeper into the room. Place them across from the main seating area to reflect the room back at viewers. Avoid centering a mirror directly across a TV, the reflection competes visually.
Size and shape: A 36–48 inch tall mirror reads as a strong statement piece without monopolizing wall space. Leaning mirrors against the wall (against a floating shelf or baseboard) work for renters but are less secure: wall-mounted mirrors are permanent and safer, especially in homes with kids or pets.
Frame options:
- Metal frames (brass, black steel, chrome) suit modern and eclectic rooms.
- Wood frames (natural, whitewashed, stained) add warmth.
- Frameless or beveled mirrors feel clean and contemporary.
Installation: Mirrors are heavy. A 24-inch mirror weighs 30–50 pounds. Use wall studs and lag bolts, or heavy-duty mirror hangers rated for the specific mirror weight. Never trust a single anchor. Follow manufacturer guidelines strictly.
Reflective alternatives: Metal wall art, copper or brass panels, and polished concrete accents provide reflectivity without the mirror effect, suiting eclectic or industrial aesthetics.
Textiles And Woven Wall Hangings
Textiles, macramé, woven tapestries, textile art, and fiber wall hangings, add texture, warmth, and acoustic softness to living rooms. They’re easier to install than shelves or mirrors and work in rental spaces.
Installation basics: Most textile hangings suspend from a wooden dowel or metal rod anchored to the wall with eye bolts or U-bolts into studs. For lightweight pieces (under 10 pounds), heavy-duty drywall anchors suffice. Ensure anchors are rated for the piece’s weight, manufacturers label this clearly.
Material variety:
- Macramé (knotted rope) adds bohemian texture and works in various color palettes.
- Woven tapestries (wool, cotton, or blend) bring pattern and color.
- Textile art (hand-dyed fabrics, stitched pieces) from artists or local makers adds originality.
- Kilim or Turkish rugs hung as tapestries blend cultural aesthetics with function.
Sizing: A wall textile should fill 40–60% of wall space above a sofa or accent chair. Too small looks lost: too large overwhelms. Measure the wall, sketch proportions, and choose accordingly.
Care and durability: Textiles collect dust. Vacuum gently with an upholstery attachment monthly, or take pieces down seasonally for a light wash (check care labels). Direct sunlight fades colors: position hangings away from south or west windows.
Textiles are forgiving for renters, no drywall damage, easily removable, and adaptable to different spaces. They’re also budget-friendly compared to large art pieces, making them ideal for frequent refreshes.
Conclusion
Transforming a living room’s walls doesn’t demand major construction or expense, thoughtful small decor choices deliver real impact. Whether floating shelves, gallery walls, live plants, mirrors, or textiles, each approach solves a practical need while adding visual character. The secret is intentionality: choose pieces that suit the room’s light and function, install them securely with proper hardware, and embrace restraint. Start with one focal wall, refine it, then expand. Small, deliberate changes beat rushed overhauls every time.